In this article I will show you how to configure privoxy on Windows.
I note this method on my blog because I have some problems with my VPN service provider. They don't allow me to share my proxy on another devices in my LAN if I need to share I have to pay more extra money. Thus it would be better I can set up my PC to be a proxy server and by pass to this VPN route.
First:
You need to do is download an program Privoxy. The version I download is privoxy_setup_3.0.21.exe.(510.4 kB) which is not a small application but it is very useful.
Second:
You need to install it on your PC. Just only click next next and next..
Third:
You need to do is configure your Privoxy server to by pass to VPN proxy server.
Append 2 lines in section 5.1 to enable forward proxy to VPN proxy.
Last but not least, you need to allow incoming inbound on port 8118.
To do that you have to launch firewall configuration Start > Type "Firewall" > Select "Windows Firewall with Advanced Security"

After firewall setting shows please follow the below steps.


Then you can go to your browser to using the proxy now.
I note this method on my blog because I have some problems with my VPN service provider. They don't allow me to share my proxy on another devices in my LAN if I need to share I have to pay more extra money. Thus it would be better I can set up my PC to be a proxy server and by pass to this VPN route.
First:
You need to do is download an program Privoxy. The version I download is privoxy_setup_3.0.21.exe.(510.4 kB) which is not a small application but it is very useful.
Second:
You need to install it on your PC. Just only click next next and next..
Third:
You need to do is configure your Privoxy server to by pass to VPN proxy server.
 |
| Edit Main Configuration |
forward / 127.0.0.1:Modify 1 line in section 4.1
forward :443 127.0.0.1:
listen-address 127.0.0.1:8118 -> listen-address 0.0.0.0:8118Above config tell privoxy to listen on any IP address, in this case I need to connect from my mobile device.
Last but not least, you need to allow incoming inbound on port 8118.
To do that you have to launch firewall configuration Start > Type "Firewall" > Select "Windows Firewall with Advanced Security"

After firewall setting shows please follow the below steps.
 |
| Windows Firewall with Advanced Security |
1. Select Inbound Rules, then 2. create New Rule..

3. Select Port to allow the connections from another deviced

4. Select TCP because Proxy server is based on TCP protocol
5. Input 8118 in Textbox

6. Allow the connection to accept connection from another devices

7. Allow all to accept connection from any interfaces, due to in Windows 7 you can specific each interface that connected is Private Network, Domain Network or Public Network. Thus you can do more fine-grain as you want
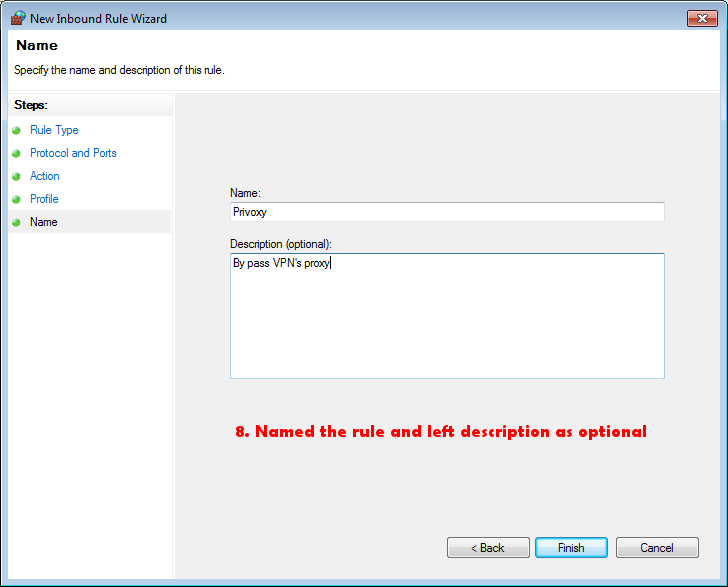
8. Set the name for the Incoming Inbound rule
Then you can go to your browser to using the proxy now.
ความคิดเห็น
แสดงความคิดเห็น